Ultimate Guide to Version 9
This post will help you getting the full benefits from upgrading to Veeam Backup & Replication v9. If you are looking for a guide on how to install the upgrade, please see my previous post > HOW-TO Upgrade to Veeam Backup & Replication v9 .
My motivation for writing this post is to highlight some of the features not too heavily promoted in marketing collateral. These “under the hood” features are often my favourite ones, and they can be game changers in most environments. The list is far from complete, so if you are looking for the full overview, have a peak at the What’s New in Veeam Backup & Replication v9 document.
To prepare you for a long wall of text, here is a quick overview of this blog post:
- First things first: Stand-alone console
- Optimize your repositories
- Optimize your backup storage
- Optimize guest interaction
- A blast from the past
- Share it!
First things first: Stand-alone console
I already spoiled this feature in my previous post. The console now supports connecting to remote servers, and is available as a separate MSI installer on the installation media (supports unattended deployment). This means you are now able to install the Veeam Backup & Replication console directly on your workstation. No more fighting with you colleagues for one of the two sessions available without Terminal Server licenses. The is the final piece in the puzzle of a full distributed architecture. Up until v9, the dependencies between Veeam.Backup.Service.exe and VeeamShell.exe were just too big. Finally, R&D did an amazing job at (quoting @Gostev) “splitting the Siamese twin”.
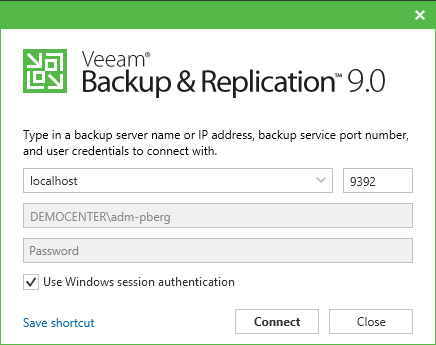
The best part of the feature is the fact that Veeam PowerShell snap-in installs as part of this component, and it includes my new favorite cmd-let: Connect-VBRServer. YES! No more PowerShell remoting to invoke your Veeam PowerShell scripts. I cannot stress how happy this makes me. There is one particular colleague in Product Management I need to buy a beer for sure.
Optimize your repositories
There are multiple new configuration settings for repositories, and I have tried to summarize them in a checklist.
-
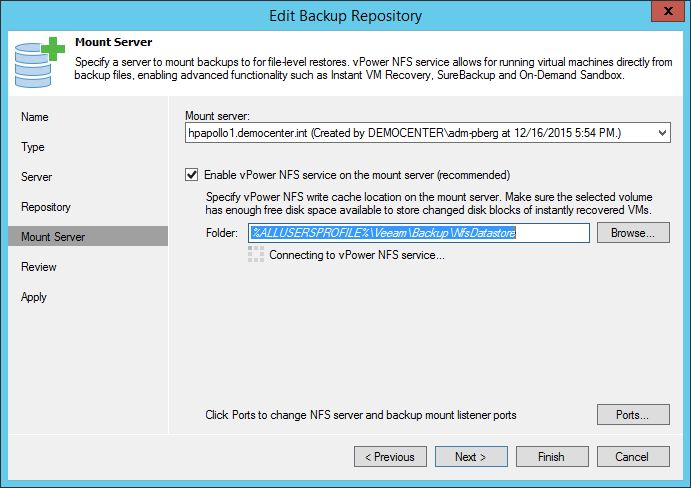
Configure the “Mount server” During file-level and item-level restores, the first mount is still performed to the console to present the object browser. But when the restore is initiated, all traffic flows between this mount server and the restore target. This should significantly speed up restores in ROBO environments. When using Enterpriser Manager for restores from virtual machines with indexing enabled, the traffic will always only flow between the mount server and the target virtual machine.
-
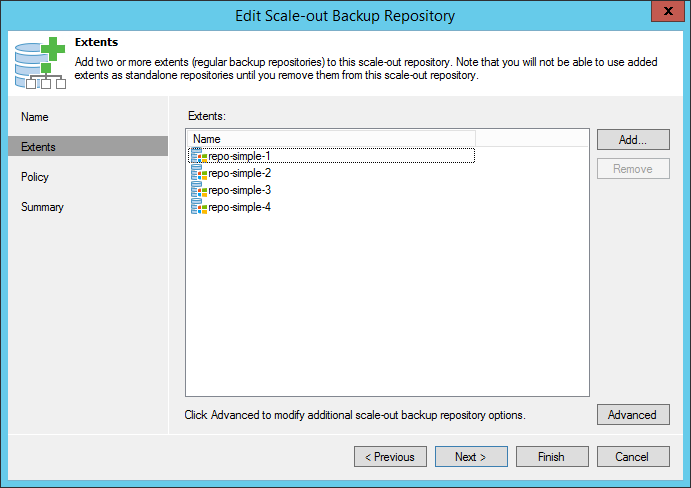
Add repositories to “Scale-out Backup Repository™” (Available in Enterprise [limited] and Enterprise Plus [unlimited]). This greatly simplifies management and optimizes the storage capacity usage as well as I/O throughput by enabling “per-VM backup chains” by default. There are already plenty of great blog posts about this feature, so I will leave further detail out of this one. I will reserve a spot for a future in-depth post about great real-world use cases instead.
-
Consider enabling per-VM backup files — on your simple repositories as well. With per-VM backup files enabled, a write stream is created per virtual machine rather than one per job. The resulting increased queue depth significantly improves performance as single stream performance (queue depth = 1) is the limiting factor on most storages today. Creating multiple streams (queue depth ~= N repository tasks) alleviates the issue. It also opens up the possibility to creating much larger jobs without the caveats of large backup files that are difficult to manage and maintain. With v9 we are considering increasing the Best Practice recommendation for number of VMs per job significantly. I have personally had great experiences with 250-300 VMs per backup job, and according to the What’s New document, jobs have been thoroughly tested with as many as 5,000 VMs per job. When designing your jobs, keep in mind that several operations such as synthetic operations, health checks and Backup Copy Jobs will be pending until all VMs in the job have completed successfully. For those reasons, extremely large jobs may be impractical, but we are still collecting and evaluating the feedback.
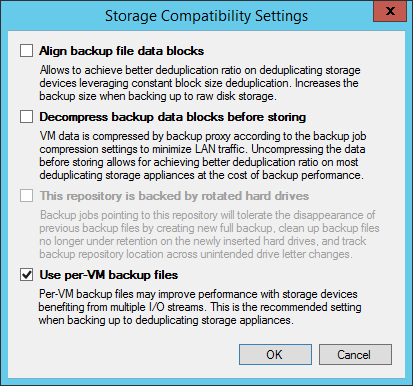
Note 1: Once enabled, you must perform an Active Full to activate the feature. Note 2: There seems to be a widespread misconception that per-VM backup files are the end of deduplication in Veeam Backup & Replication. This could not be further from the truth, as source side deduplication is still highly effective. When creating new repositories backed by deduplication storages such as EMC DataDomain via DDBoost, HP StoreOnce via Catalyst and ExaGrid via Accelerated Data Mover, per VM backup files will be enabled automatically.
Optimize your backup storage
After upgrading, some new features are disabled by default. It is highly recommended to change the job settings to leverage these new capabilities.
- Health check, self-healing and compacting Incremental forever backup modes have been the default setting for a long time, however health check and compacting features have ever only been part of the Backup Copy Job. Compacting is relevant when you use a backup mode with no periodical full backups such as forward incremental forever or reverse incremental. Compacting will copy all non-deleted blocks to a new backup file and delete the old one. This frees up space and reduces fragmentation. The storage-level corruption guard aka. health check performs a periodical CRC check on your backup files to help you identify backup storage bit rot. If a corruption is detected, the feature will automatically try to heal the block by fetching it again from production storage. In combination with SureBackup, this should give you even more confidence in your incremental forever backups.
- Enable BitLooker “Exclude deleted files”. The last of the secret v9 features – it is just too cool (and patent pending). NTFS never reclaims deleted data blocks in the filesystem, when files are deleted. This means that an image-based backup for a VM may have to process more data blocks than what are actually used in the file system. Due to well-known file system limitations, the only way to reclaim those blocks is to use a tool such as
sdeletefrom SysInternals. Imagine if you could runsdeleteevery day for all your VMs right before the backup kicks in? That is BitLooker for you (except that it does not actually manipulate the VM, of course). One simple checkbox and Veeam analyzes the NTFS MFT and excludes disk offsets for data blocks that are marked as deleted. Free disk space for everybody. This setting is not automatically enabled for existing jobs post upgrade, so if you want to do just so, here is PowerShell to the rescue. Try executing it from your new remote console?
asnp VeeamPSSnapin; Foreach ($job in Get-VBRJob) {
$job.Options.ViSourceOptions.DirtyBlocksNullingEnabled = $true;
$job.SetOptions($job.Options) }
Optimize guest interaction
- Check the “Guest Interaction Proxy” This new component will handle injecting the Veeam VSS guest into VMs helper during backup jobs, while it was pushed from the backup server in previous versions. Leaving the setting to “automatic selection” will try to use a Veeam managed server residing in the same network subnet as the target VM, and otherwise (just like with backup proxies is NBD mode) it may be a good idea to manually specify one or more GIPs per backup job. The GIP is a nice feature part of the “ROBO enhancements”. It will greatly improve performance and simplify management, as it can reduce the number of VMs failing over to VIX processing via VMware Tools. Executing files (such as the Veeam VSS helper) via VIX requires UAC being disabled or using a SID 500 user account, which is not always ideal.
- Configure file exclusions Witchcraft? Yes, that is right: File exclusions on an image-based backup. This is part of BitLooker technology. The difference here is that the MFT stored in the restore point is actually manipulated after excluding the offsets, so that excluded files and folders will not show up during file-level restores. This bit requires application-aware image processing being enabled, and expect around 2 minutes processing time and 400 MB RAM usage on the proxy to exclude 100,000 files.
A blast from the past
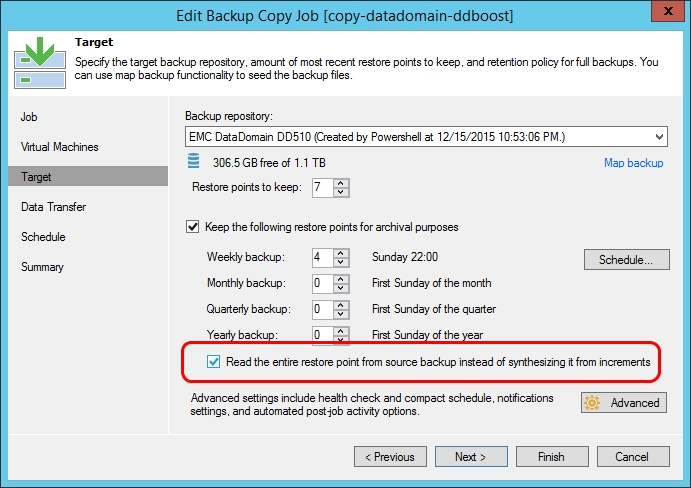
Did you previously use my PowerShell script for performing active full backups to your less performant backup copy job target? The blog post Active Full Backup for Backup Copy Job is to this date still one of the most popular ones on this blog. Good news! There is now a simple checkbox to enforce this behaviour:
Share it!
If you found this blog post to be helpful, I would be happy to see you sharing it with your social networks.